
Understanding Dielines in Printing: A Guide
Here will be an introduction paragraph about dielines, why they’re confusing, and maybe a brief history. Include keywords for dieline-related projects that might drive organic traffic.
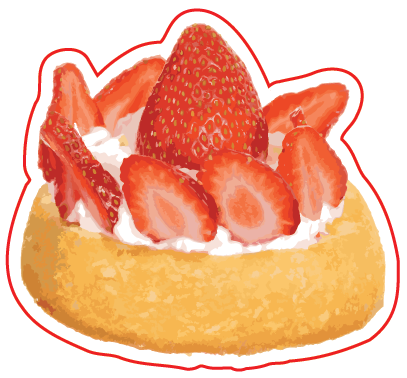
See that outline? That is a vector die! It tells the machine where to cut!
What is a die line?
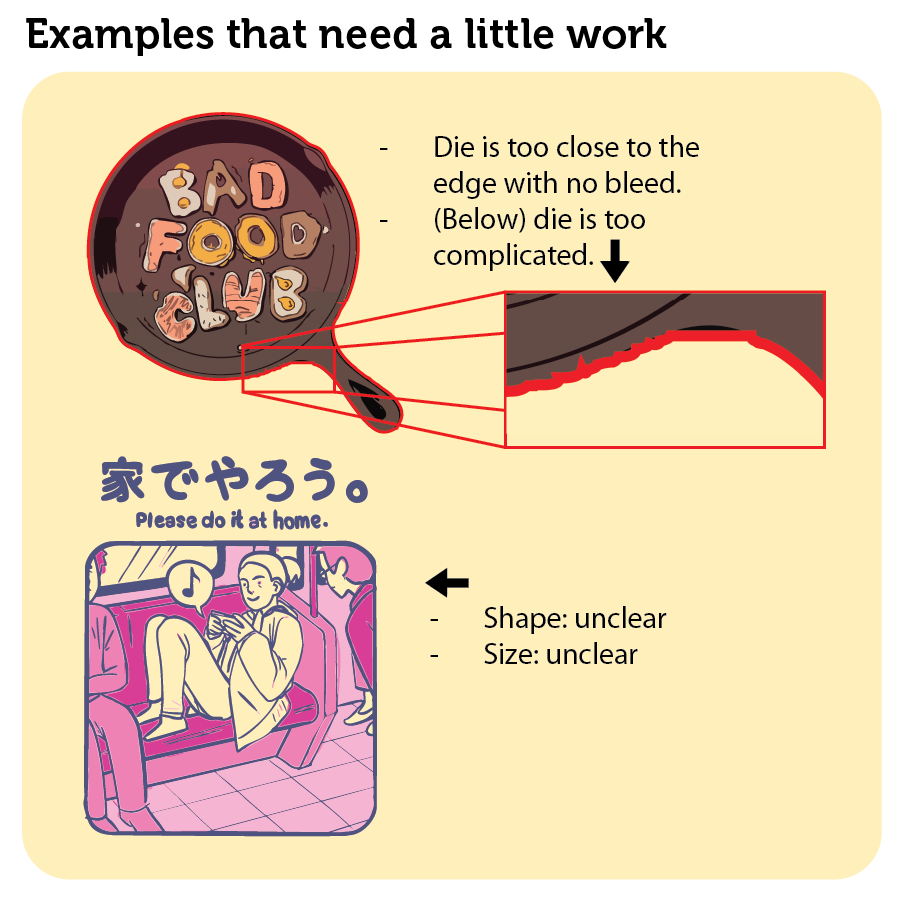
A dieline is an indicator to show where you want your project to cut. It is always best practice to put a dieline on ANYTHING that is not a square or rectangle.
What is bleed?
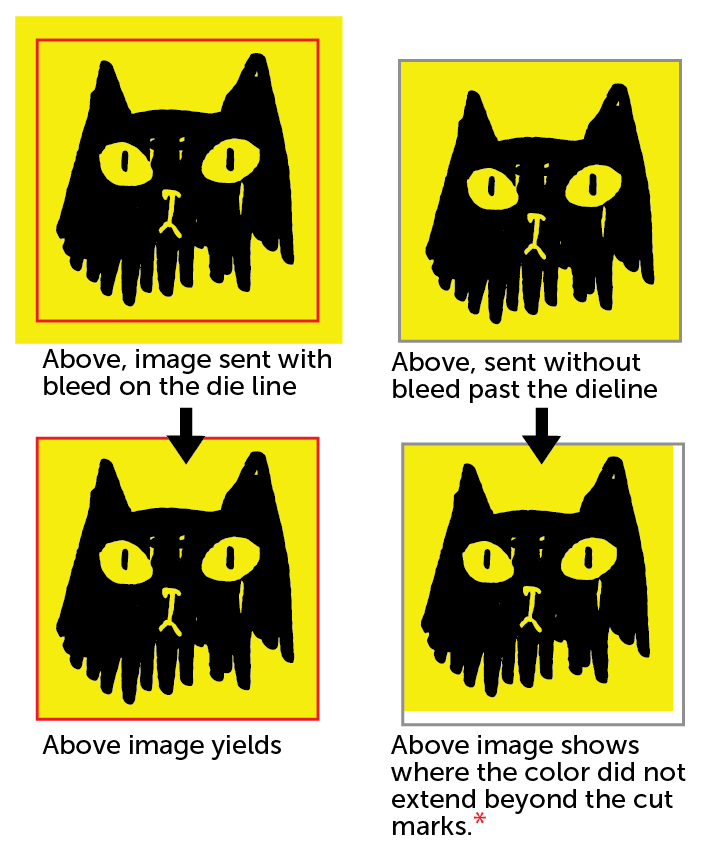
*No digital printer is 100% on the mark. Bleed is to account for shifts or very minor skewing that is normal to the process. It isn’t noticeable until you have these white edges showing on nal cut bleedless art.
Bleed is needed for any project that has color going beyond the edge of the page – ensuring that the cutting process doesn’t mess up the print itself. It’s essentially the extra space around the artwork to give room for the cut edge.
Why only tracing the art won't work:
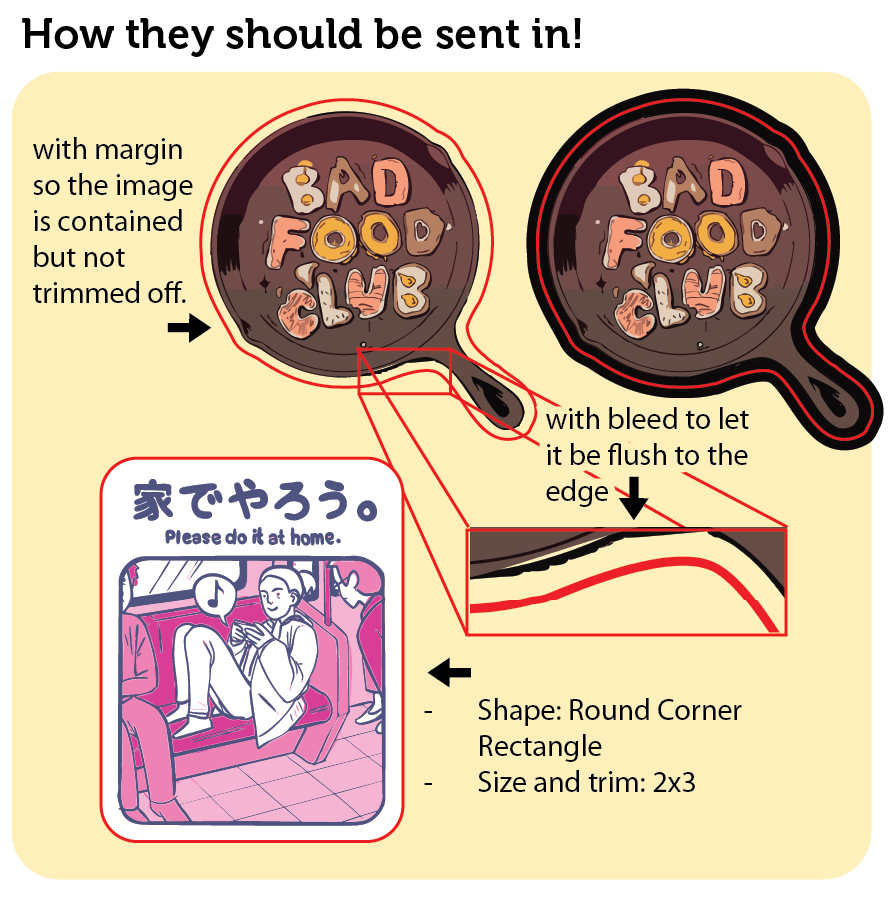
- If the art prints to the edge of the sticker, sticker art should extend at least .125" past the edge of the die line (See example (A1) again for a good reference)
- If stickers do not print to the edge of the sticker, sticker art should try to stay .125" space away from the edge of the die line so the cutter has wiggle room and does not damage the art.
What if I can’t save layers for the die?
Send two files, a die file and an art file, with the exact same size and placement when in doubt, but this will add to the cost of the file prep.
A Step-By-Step Guide For Illustrations That Need Dielines to Print:
Photoshop Instructions
Raster-based programs process:
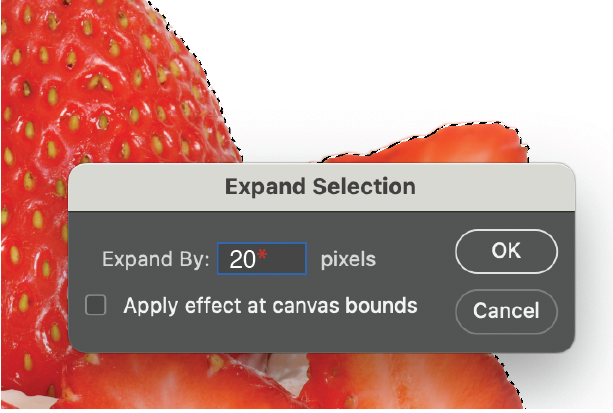
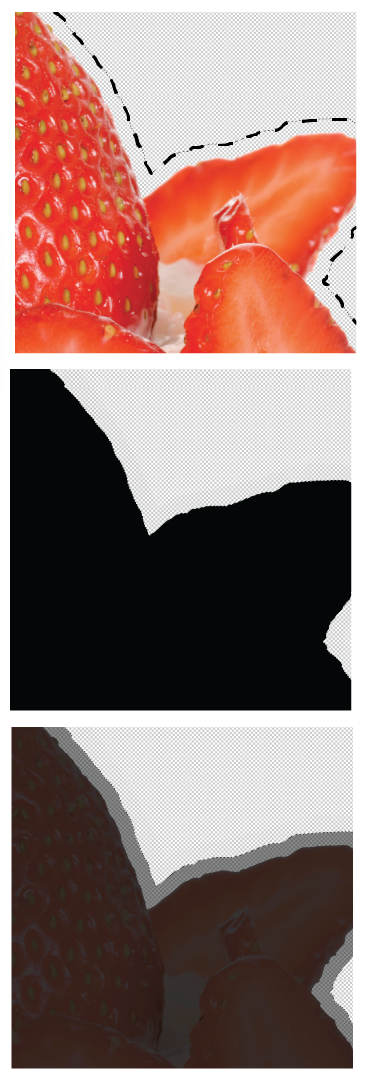
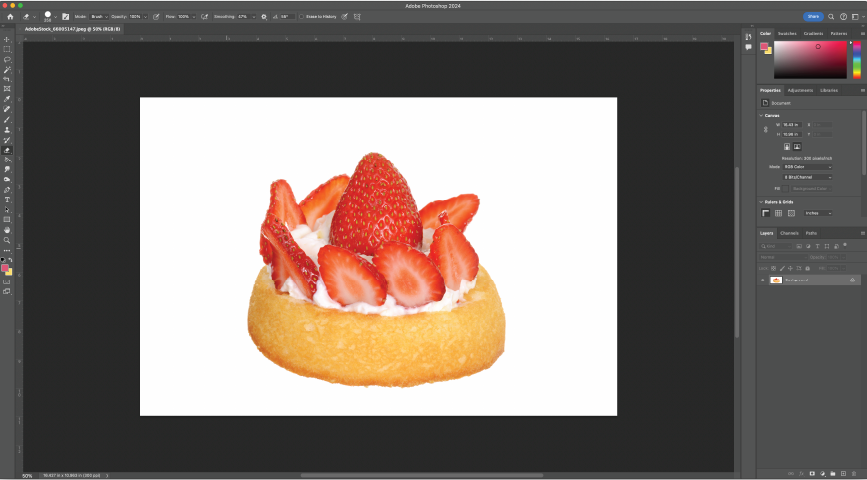
It’s pretty common for the shop to finalize your die for you, especially if you are working in a raster-based program like Photoshop. Here are the steps to prep your file for us to finish: Save a copy of your art, make sure your original is SAFE AND SOUND.
In this copy file, turn off the background layer so that it is just the shape you want to cut. Merge all of the layers and select the negative space around them. Inverse the selection so that all of your art is selected.
From the select menu go to Modify > Expand and type in 20pt*
Now make a new layer and fill it with white. If you want the design to bleed out feel free to change it around. Some options here are to add a fill behind the art to make it bleed, just make sure there is color beyond the die itself to account for bleed. If you want an image to bleed beyond the sticker, make the die above the image (use the shaped lasso tool or circle marquee or even a vector shape you found on the internet, as long as it is on a separate layer we can work with it from there. The important part on your end is making sure whatever needs to bleed is beyond the cut (by at least .125 on each side)
SAVE AS A .PSD SO THE FILE KEEPS LAYERS
*20 is just an example here, you want to give your art a sizable boarder so the die line to has some wiggle room to account for any shift in printing.
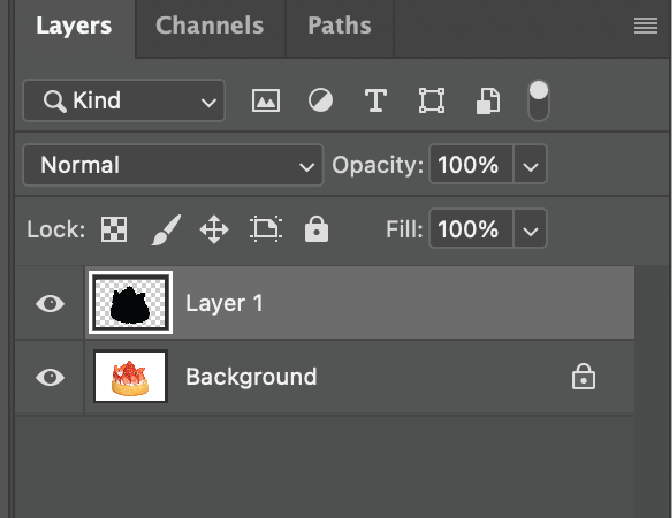
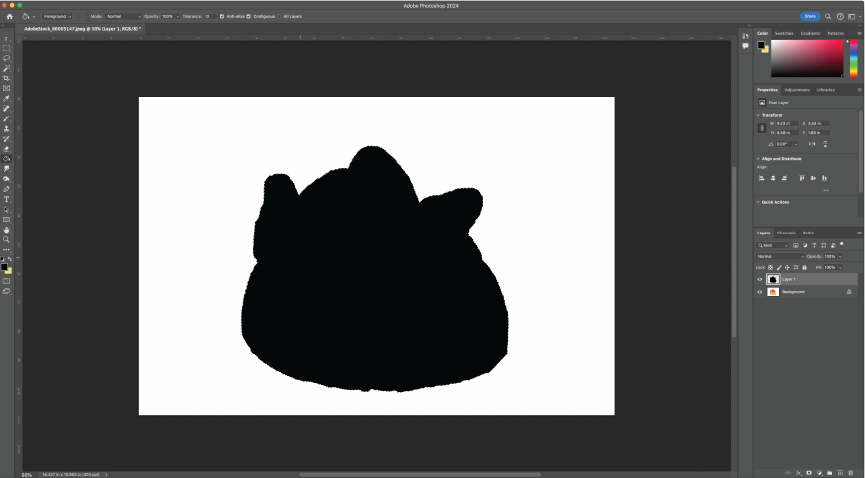
Illustrator Instructions
Whether you’re making stickers, hang tags, or any number of custom projects, learning how to set up a digital die lets your project take shape in any way you can imagine!
Please note, these instructions are for Illustrator specifically but feel free to use any vector based program that will allow you to save out your layers in PDF form–this will be important later!
After the PHOTOSHOP INSTRUCTIONS Follow these steps:
Import the PSD into Illustrator. When prompted convert layers to objects (See image A below!).
Using your new silhouette layer from Photoshop, go to Object>Image Trace>Make, (Image B) then edit in the Image Trace Window to get the desired shape. Expand your traced object. (Image C) Object>Simplify (Image D) will help delete unwanted points (the fewer the better for a clean cut)
Outline your shape, it should look about like the third cat image above.
Switch the fill to a stroke, then follow from step 3 below.
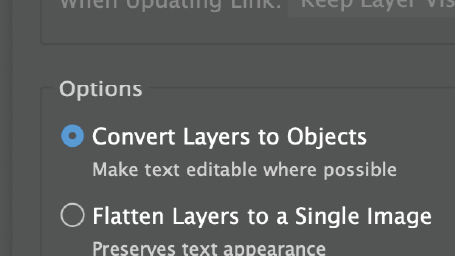
IMAGE A
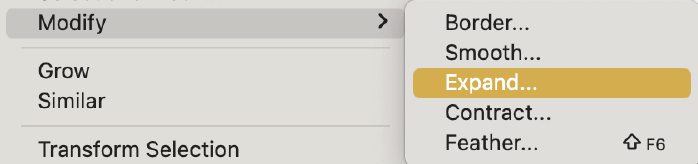
IMAGE C
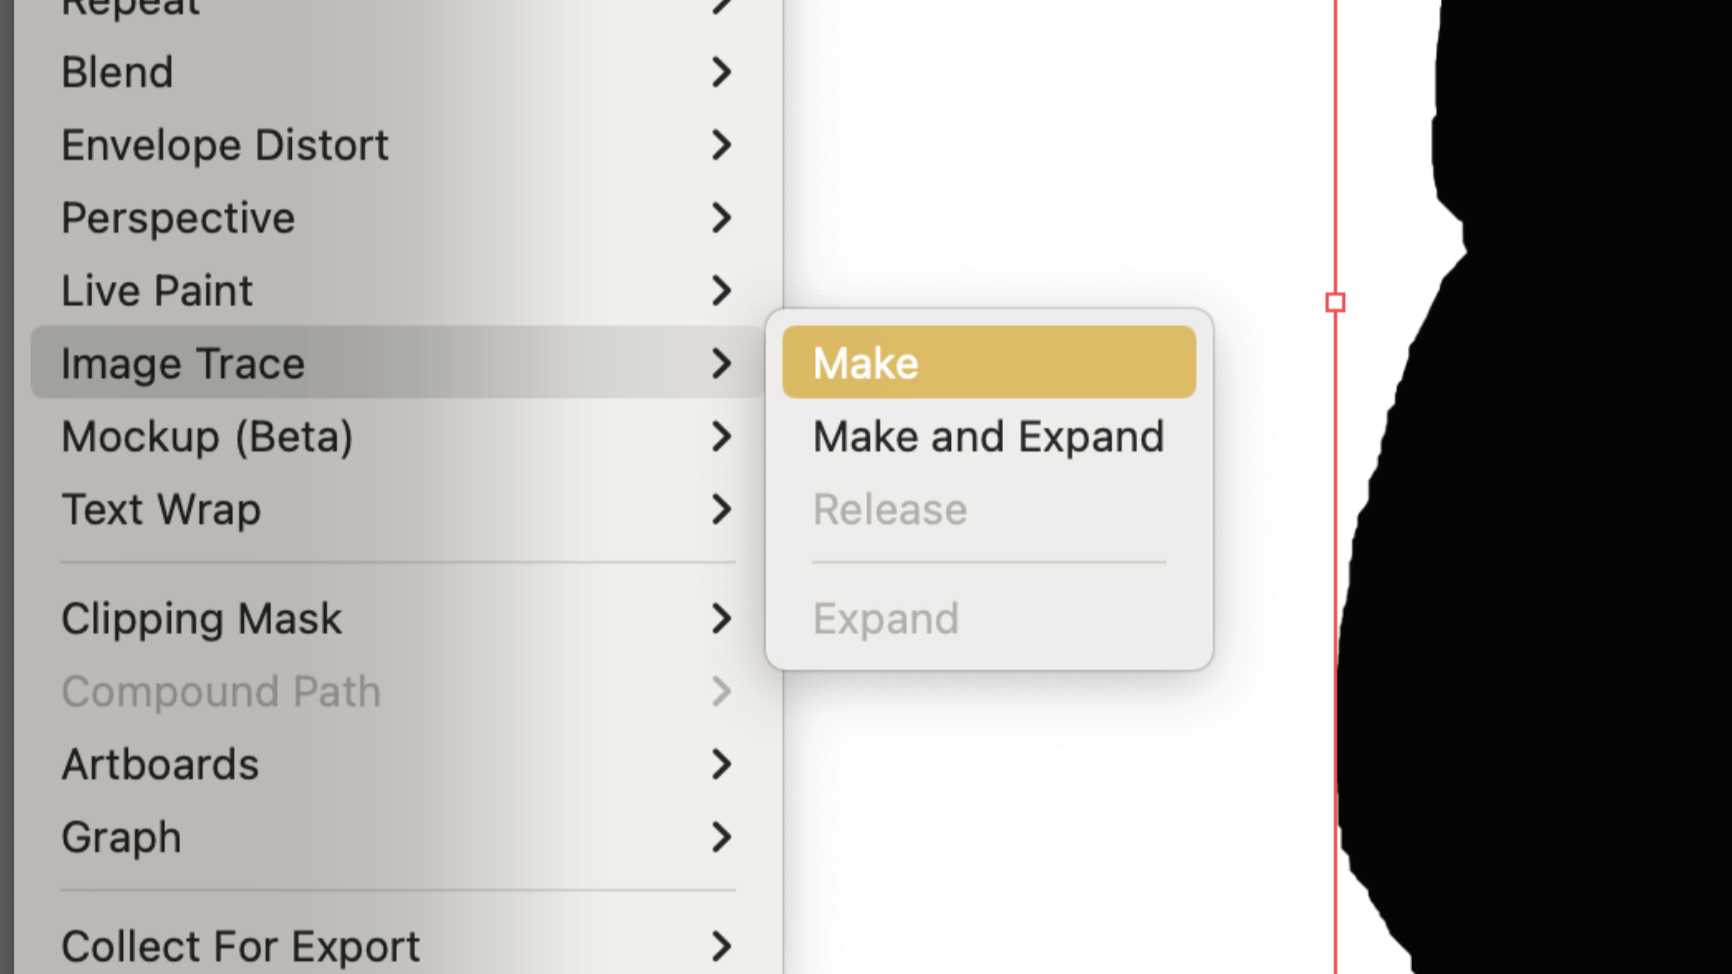
IMAGE B
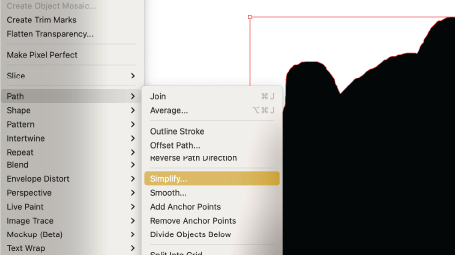
IMAGE D
Illustrator Without Raster (start here!!):
First, flatten your finished image–no live type or linked images!*
Add a second layer making sure to leave your art as the bottom layer (if you’re worried, lock the art layer).
On the second layer, use the shape tool or the pen tool to draw a .5pt (half of 1pt!) red (RGB 255,0,0) line of the desired shape–do not try to trace the edge of your image exactly or you may be disappointed if the machine cutting your project isn’t as exact as you’d
like. We recommend leaving at least .125” between the cut line and any image/text.
Account for bleed! Make sure that any color that needs to go all the way to the cutting edge goes out at least another .125” from the die.
Exporting: Save the PDF with crops and bleed and be sure to check Preserve Illustrator Editing Capabilities and Create Acrobat Layers from Top-Level Layers (Only avalible with Illustrator defult PDF settings (E)
*This is so we can open the file without losing the design to unsupported typefaces or missing images.
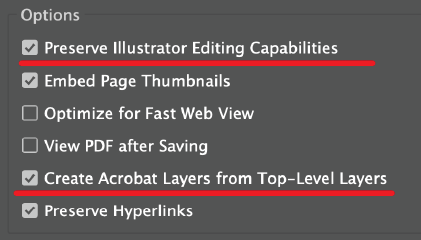
IMAGE E